prereqs:
-
find this usb and install linux on your computer (plug the usb in, access the boot menu (most likely f12, delete, or escape), as set the priority of the usb to the highest)
-
install either the ubuntu or linux mint iso following the steps on the usb (or whatever other distro if you’re good with it)
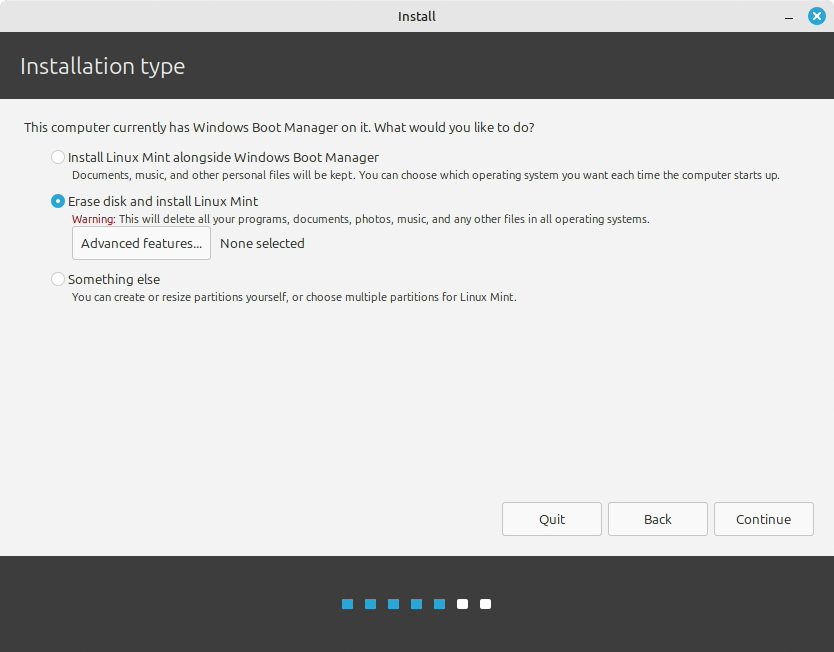
CLICK INSTALL ALONGSIDE WINDOWS BOOT MANAGER. DO NOT REMOVE WINDOWS (unless you have another laptop for fusion and stuff)
-
follow the instructions in installing linux. boot into linux when done (you may have to go to the boot menu and change the boot priority to “ubuntu” or whatever the linux version is)
-
now that you’re on linux, open terminal and install hugo using
sudo apt install hugo(enter your password when prompted)

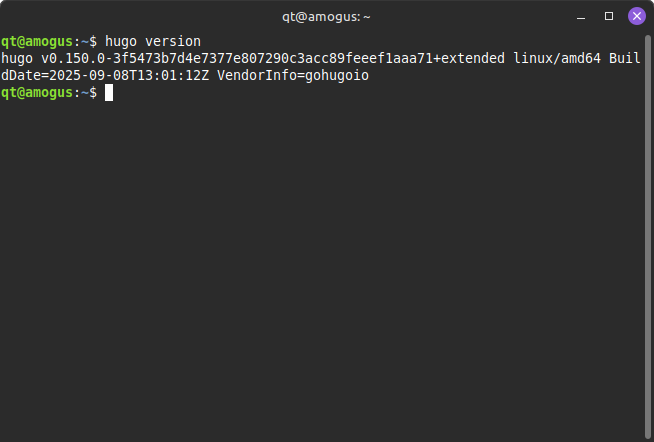
- run hugo version to ensure you’re on the latest release
-
if you are not on the latest hugo release check here and install the
hugo_0.150.0_linux-arm64.debversion and follow instructions -
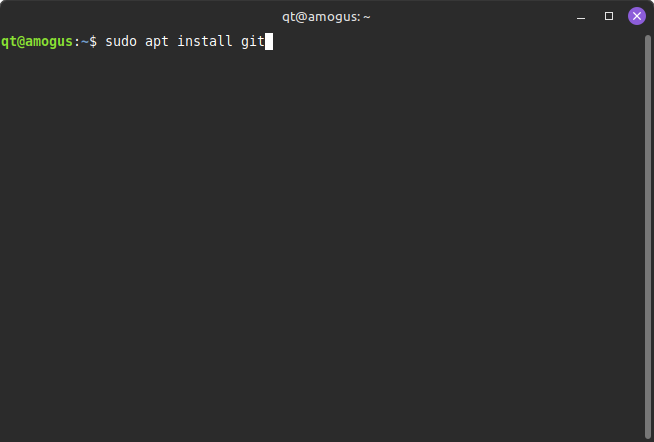
install git using
sudo apt install git
-
by now you should have hugo and git installed. if so, start looking for a theme you want
-
go to this website and click “download”.
NOTE: this guide assumes you are using papermod. each theme will have different ways to do things. read the documentation of the theme if you want a different theme.
- you should be on their github now. keep this tab open
setting up your website
-
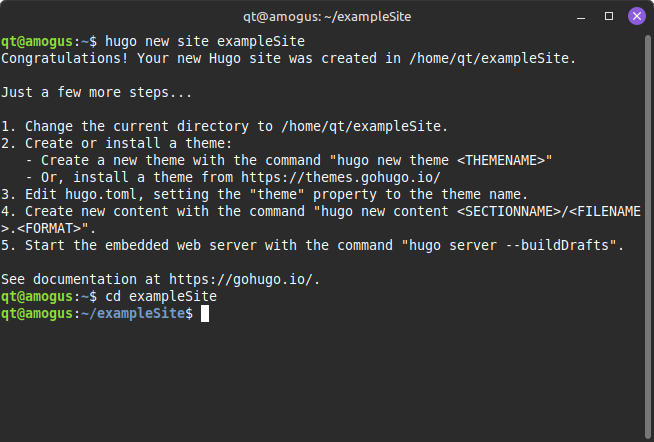
to create a hugo file, open your terminal and run
hugo new site *your website folder name* -
run
cd *your website folder name*
if you don’t see something like this, then you did something wrong
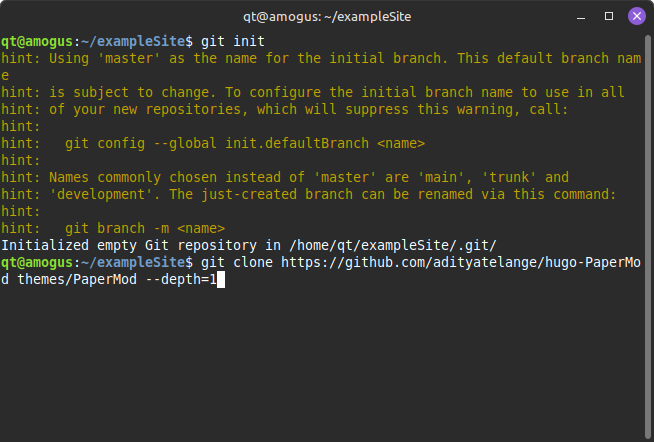
- run
git initandgit clone https://github.com/adityatelange/hugo-PaperMod themes/PaperMod --depth=1url is different if you use a different theme
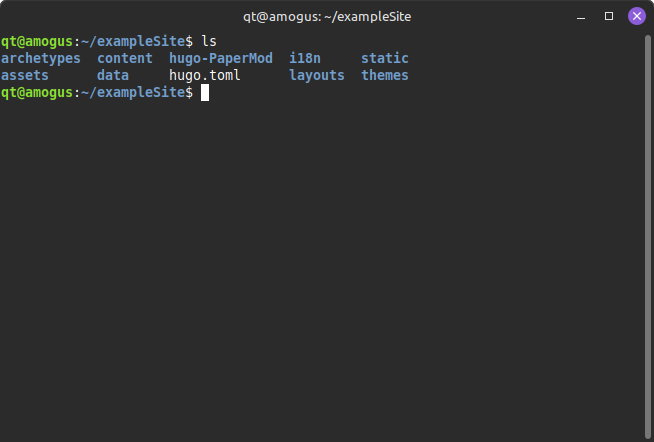
- from here, type
lswhich should show you all your files.
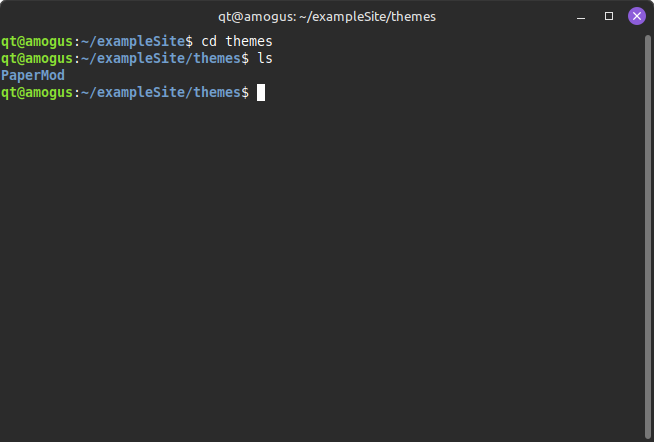
4a. Optional, but go into themes folder using cd themes and then ls to ensure that PaperMod is installed correctly
- open the
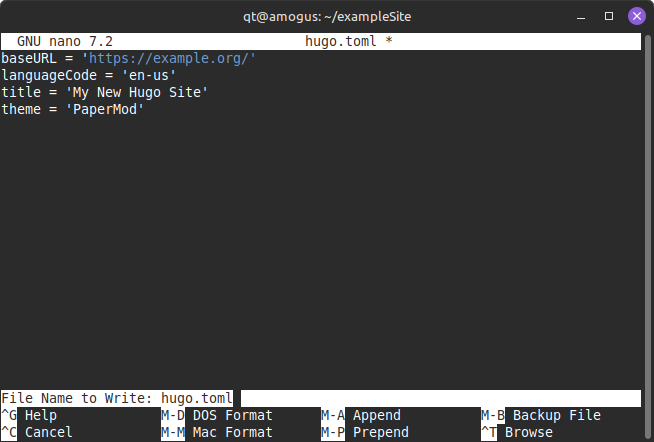
hugo.tomlfile withnano hugo.tomlorcode hugo.tomlif you have visual studio code installed
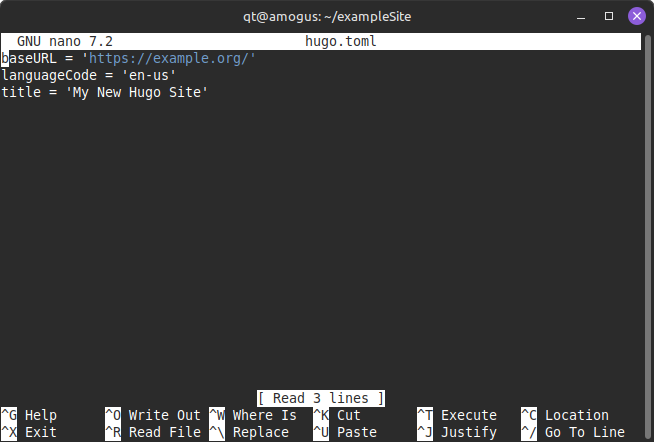
- add the line
theme = 'PaperMod'under title
-
close out of the terminal using
ctrl+xand clickyto save the file andenterto close the nano. you should be back to terminal in your website main directory -
run
hugo serverwe will populate the page later. if there are errors, ensure you followed all the steps closely.
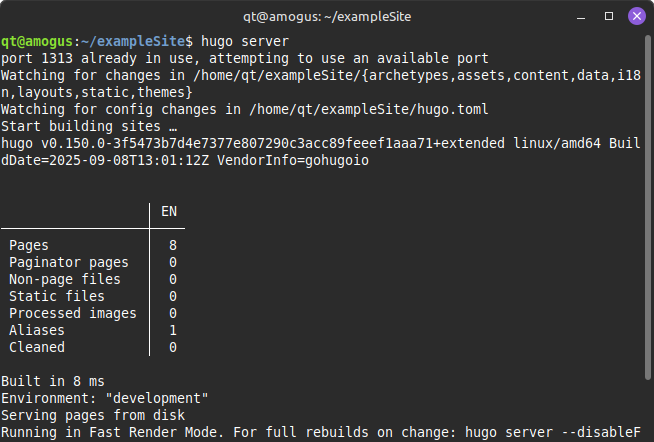 NOTE: hold control and click on the http://localhost:1313/ (numbers may differ) to open the website
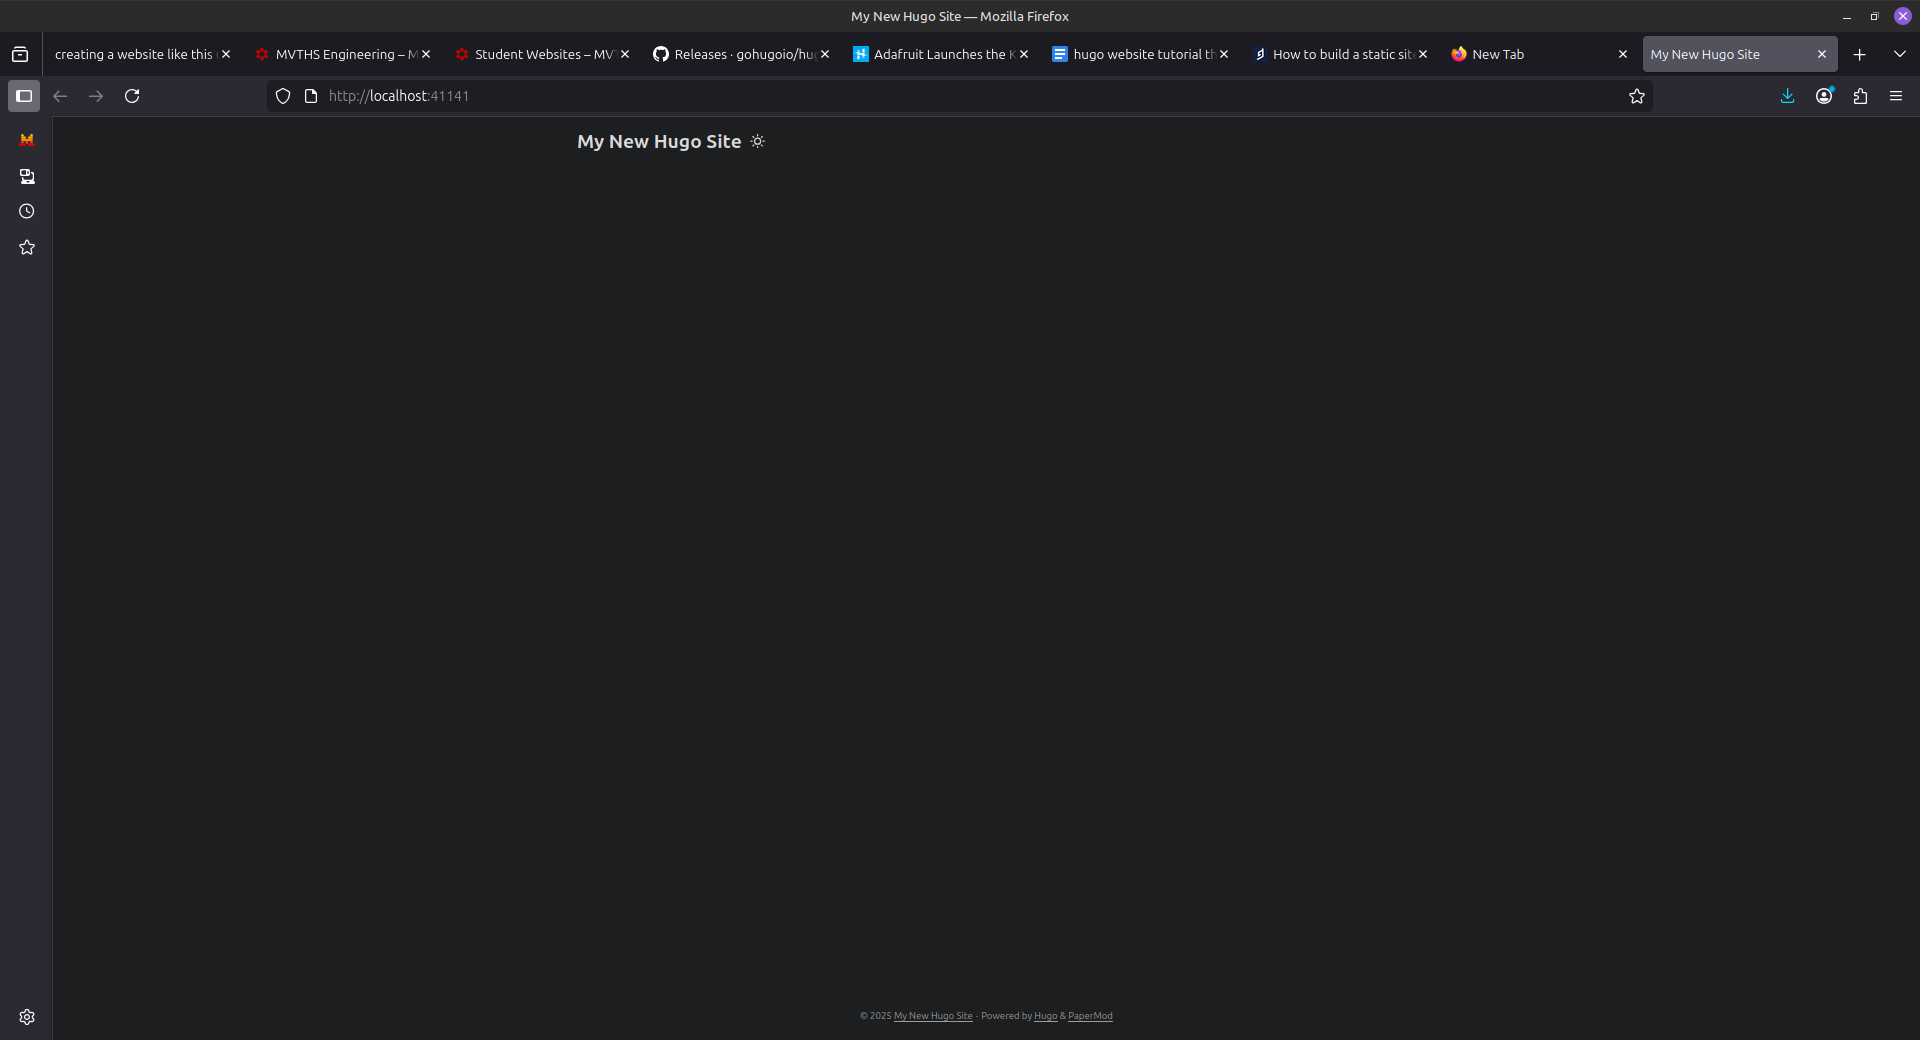
- you should see this. if so, move on to the next part
populating home screen and everything else
-
go back to your
hugo.tomlfile by runningnano hugo.toml -
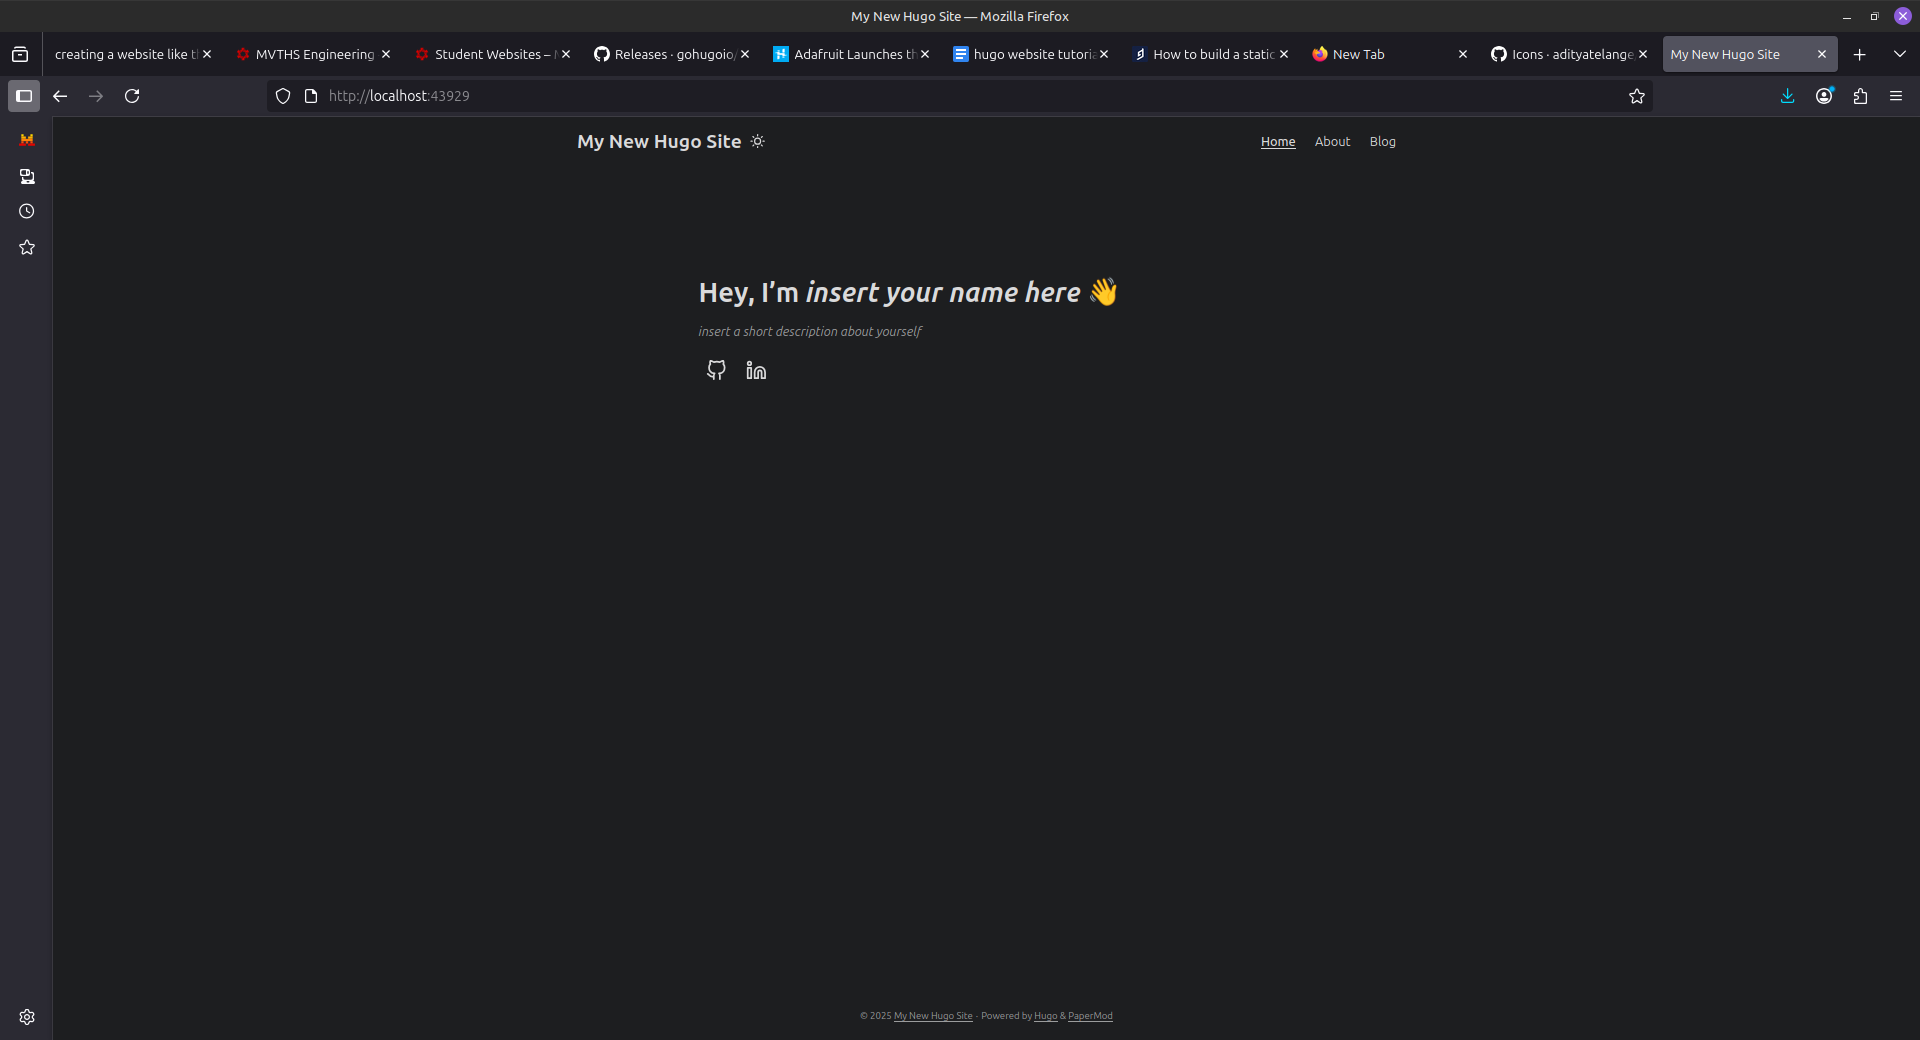
copy the following into your
hugo.tomlfile. you may have to usectrl + shift + v
[params]
  [params.homeInfoParams]
      Title = "Hey, I'm *insert your name here* 👋"
      Content = "  *insert a short description about yourself*  "

[[params.socialIcons]]
  name = "github"
  url = ""

[[params.socialIcons]]
  name = "linkedin"
  url = ""

[[menu.main]]
  identifier = "home"
  name = "Home"
  url = "/"
  weight = 10

[[menu.main]]
  identifier = "posts"
  name = "Blog"
  url = "/posts/"
  weight = 20

[[menu.main]]
  identifier = "about"
  name = "About"
  url = "/about/"
  weight = 20


[markup]
  [markup.goldmark]
    [markup.goldmark.renderer]
      unsafe = true
2a. if you want to add more social links (to your email perhaps, view this website) and copy and paste everything in one of the [[paramas.socialIcons]] but change the name and url. similiarly to the [[menu.main]] stuff.
- rerun
hugo serverto ensure that your website works. if there is an error double check everything. you should something like this.
making blog posts and other directories
if you tried clicking on the “about” or “blog” section, you won’t see anything. to fix this, we will create these directories with a blog post
- on your terminal in whatever you named your website folder (exampleSite in my case) run
hugo new posts/title-of-article.md. replace title-of-article with your title.
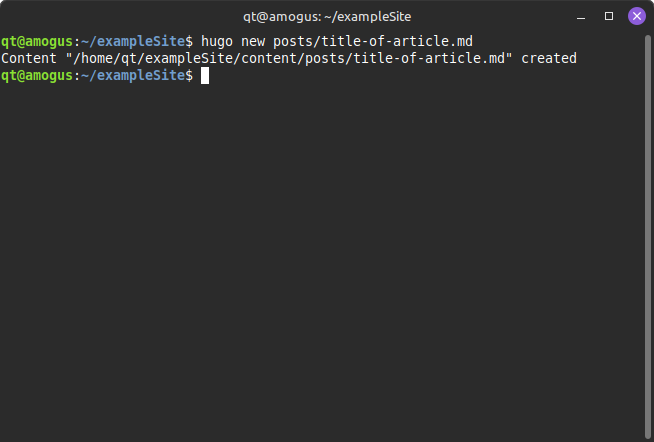
NOTE: this is how you will create blog posts from now on. just change the title each time. optionally, open your file manager and create a folder to store each blog for each year
-
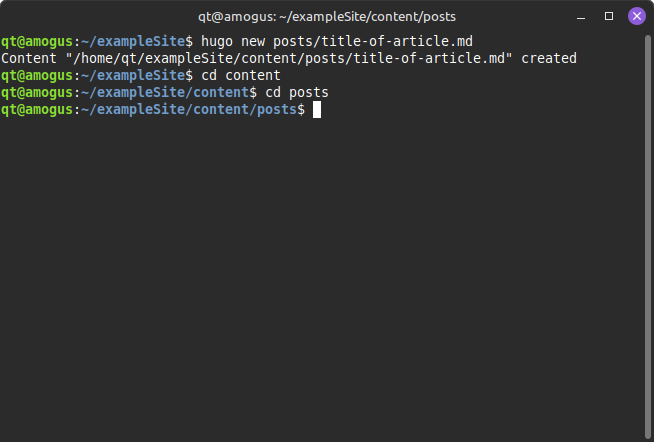
open a new terminal window and navigate to your folder and run
hugo server. don’t touch this terminal from now on as it will auto-update itself whenever you make an update -
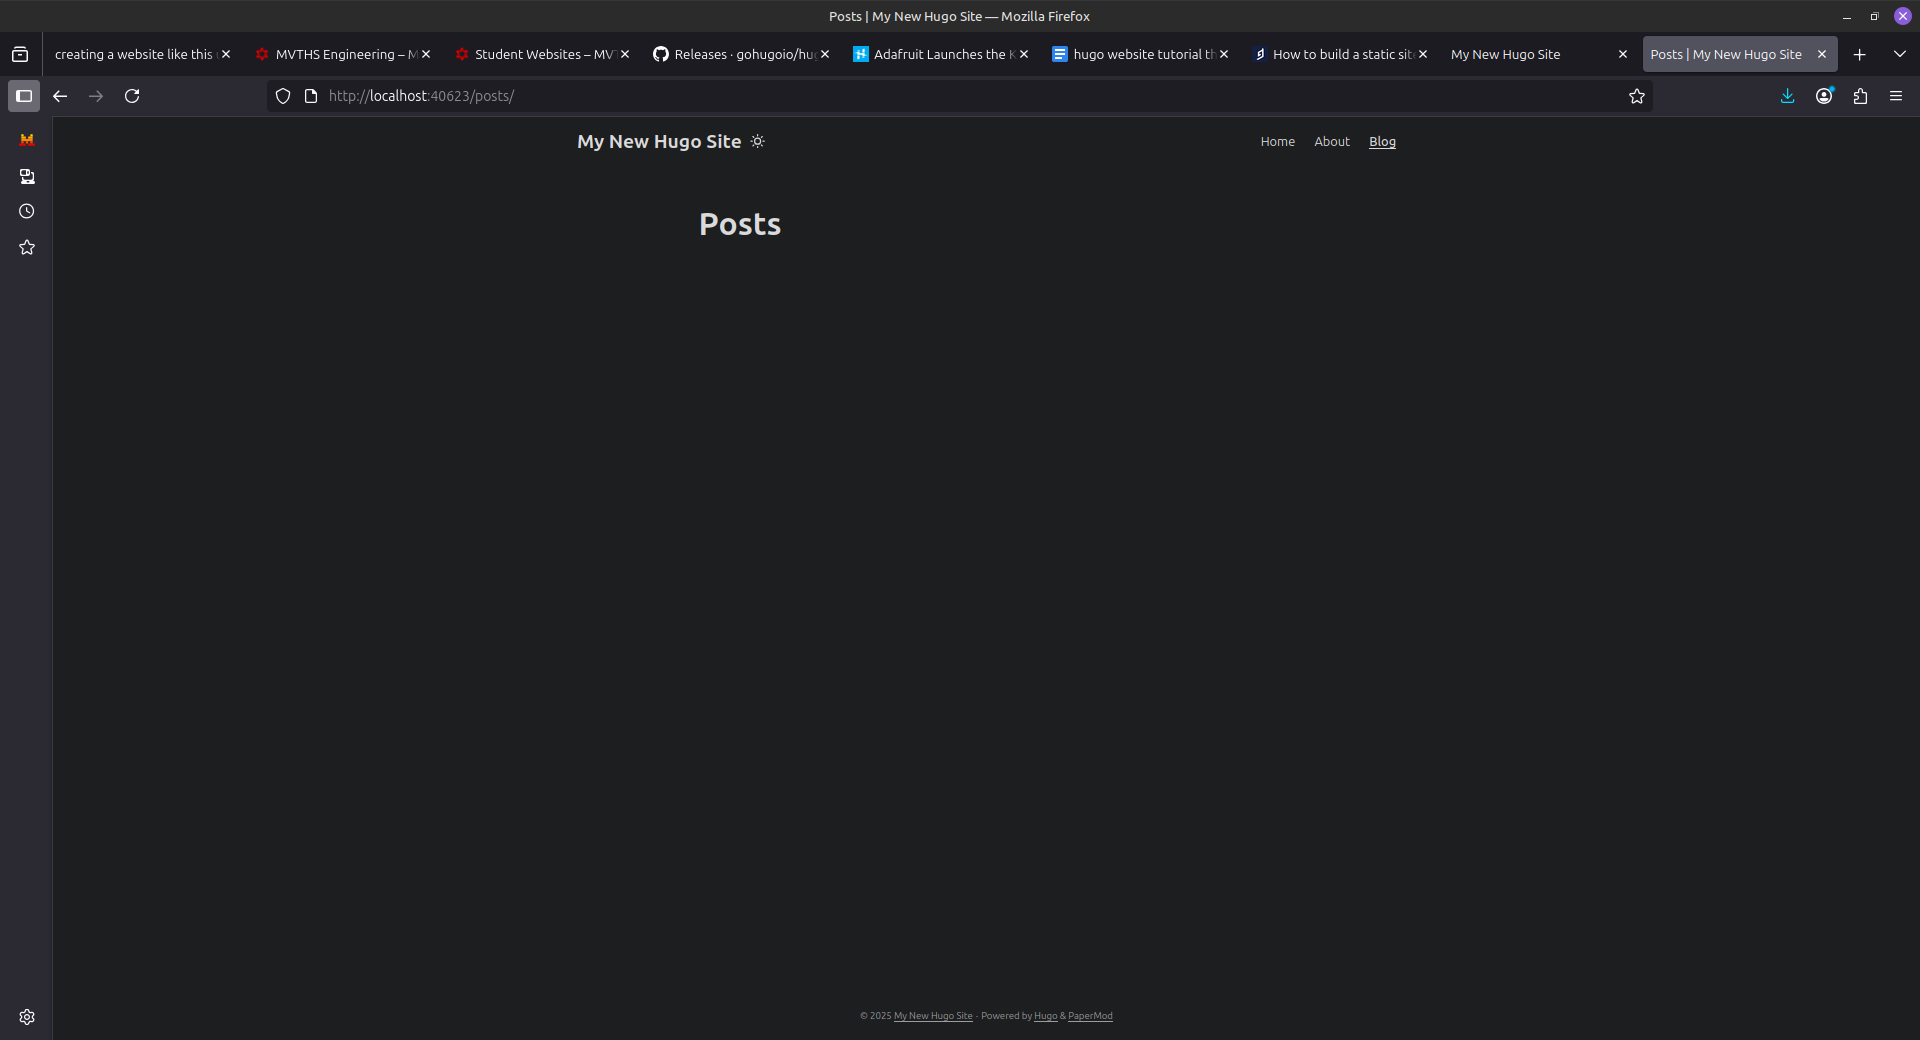
open your
blogsection on your website. you should see something other than a 404 error this time.
- to populate this, go to the terminal window that isn’t running
hugo server. from here, go to your content folder withcd contentthen go to posts folder withcd posts
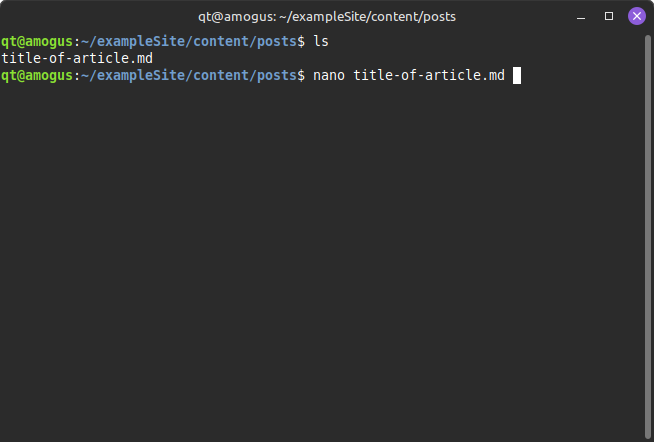
- run
lsto see all your files, and then runnano title-of-your-article.md
- change
draft = truetodraft = falseand put a title to your first article
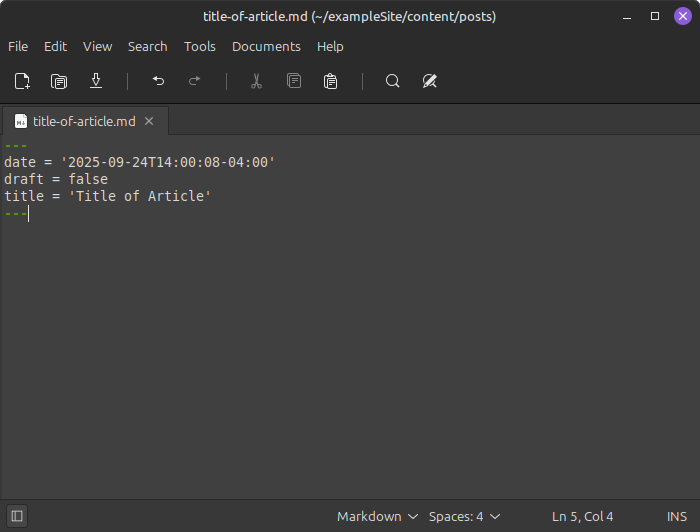 NOTE: some may have — , some may have +++. DO NOT CHANGE THIS AS IT WILL BREAK YOUR SITE
- refer to the first blog post titled “hugo blog post guide” to see all the custom things in a hugo website
about page
-
go back to your original folder (that you made when you ran hugo new site your site name) and run in terminal
hugo new about.md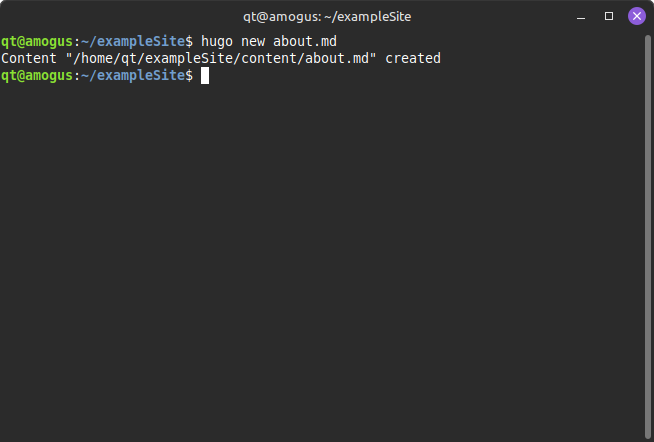
-
open that file by doing
cd contentandnano about.mdafterwards.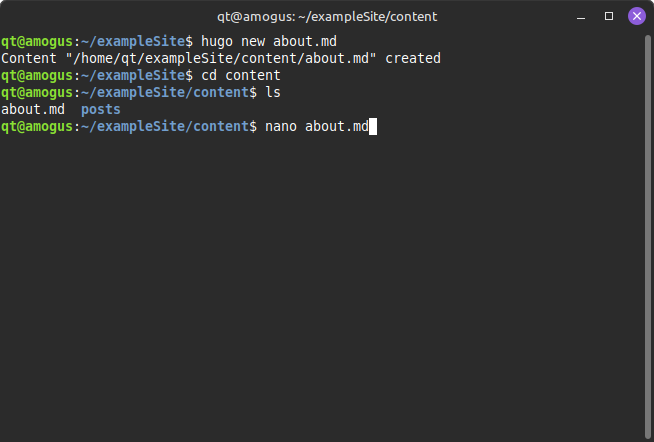
-
copy and paste the following code
+++
title = "About Me"
draft = false
+++
<style>
.about-grid {
    display: grid;
    grid-template-columns: minmax(0, 1fr) 320px;
    column-gap: 2rem;
    align-items: start;
    margin-top: 2rem;
}

.about-text {
    min-width: 0;
    align-self: center;
    margin: 1rem;
}

.about-photo {
    align-self: center;
}

.photo-placeholder {
    width: 100%;
    aspect-ratio: 7 / 10;
    background: linear-gradient(135deg, #f1f3f4 0%, #e8eaed 100%);
    border-radius: 10px;
    overflow: hidden;
    border: 1px solid #ddd;
}

.photo-placeholder img {
    width: 100%;
    height: 100%;
    object-fit: cover;
    display: block;
}

.about-text h2 {
    margin-bottom: 1rem;
    font-size: 1.8rem;
}

.about-text p {
    line-height: 1.8;
    margin-bottom: 1rem;
}

@media (max-width: 768px) {
    .about-grid {
        grid-template-columns: 1fr;
        row-gap: 1.5rem;
    }
    .about-photo {
        justify-self: center;
        align-self: start;
        width: min(100%, 320px);
    }
}
</style>

<div class="about-grid">
    <div class="about-text">
        <p>  write a little about yourself here  </p>
        <p>  write a little about yourself here  </p>
        <p>  write a little about yourself here  </p>
    </div>
    <div class="about-photo">
        <div class="photo-placeholder">
            <img src="https://www.shutterstock.com/shutterstock/photos/238415209/display_1500/stock-photo-full-body-young-man-posing-full-body-in-the-studio-238415209.jpg" style="width: 100%; height: 100%; object-fit: cover; border-radius: 10px;">
            replace url with a photo of yourself using /*photo name* . PUT ALL IMAGES IN STATIC (optionally, create a new folder in static to separate images by blog post / years. if so, do /(name of your new folder)*photo name* )
        </div>
    </div>
</div>

---

*A NOTE IF YOU WANT*
-
save the file using
ctrl + x,y, thenenterto exit nano -
navigate to your
aboutsection and it should look like this:
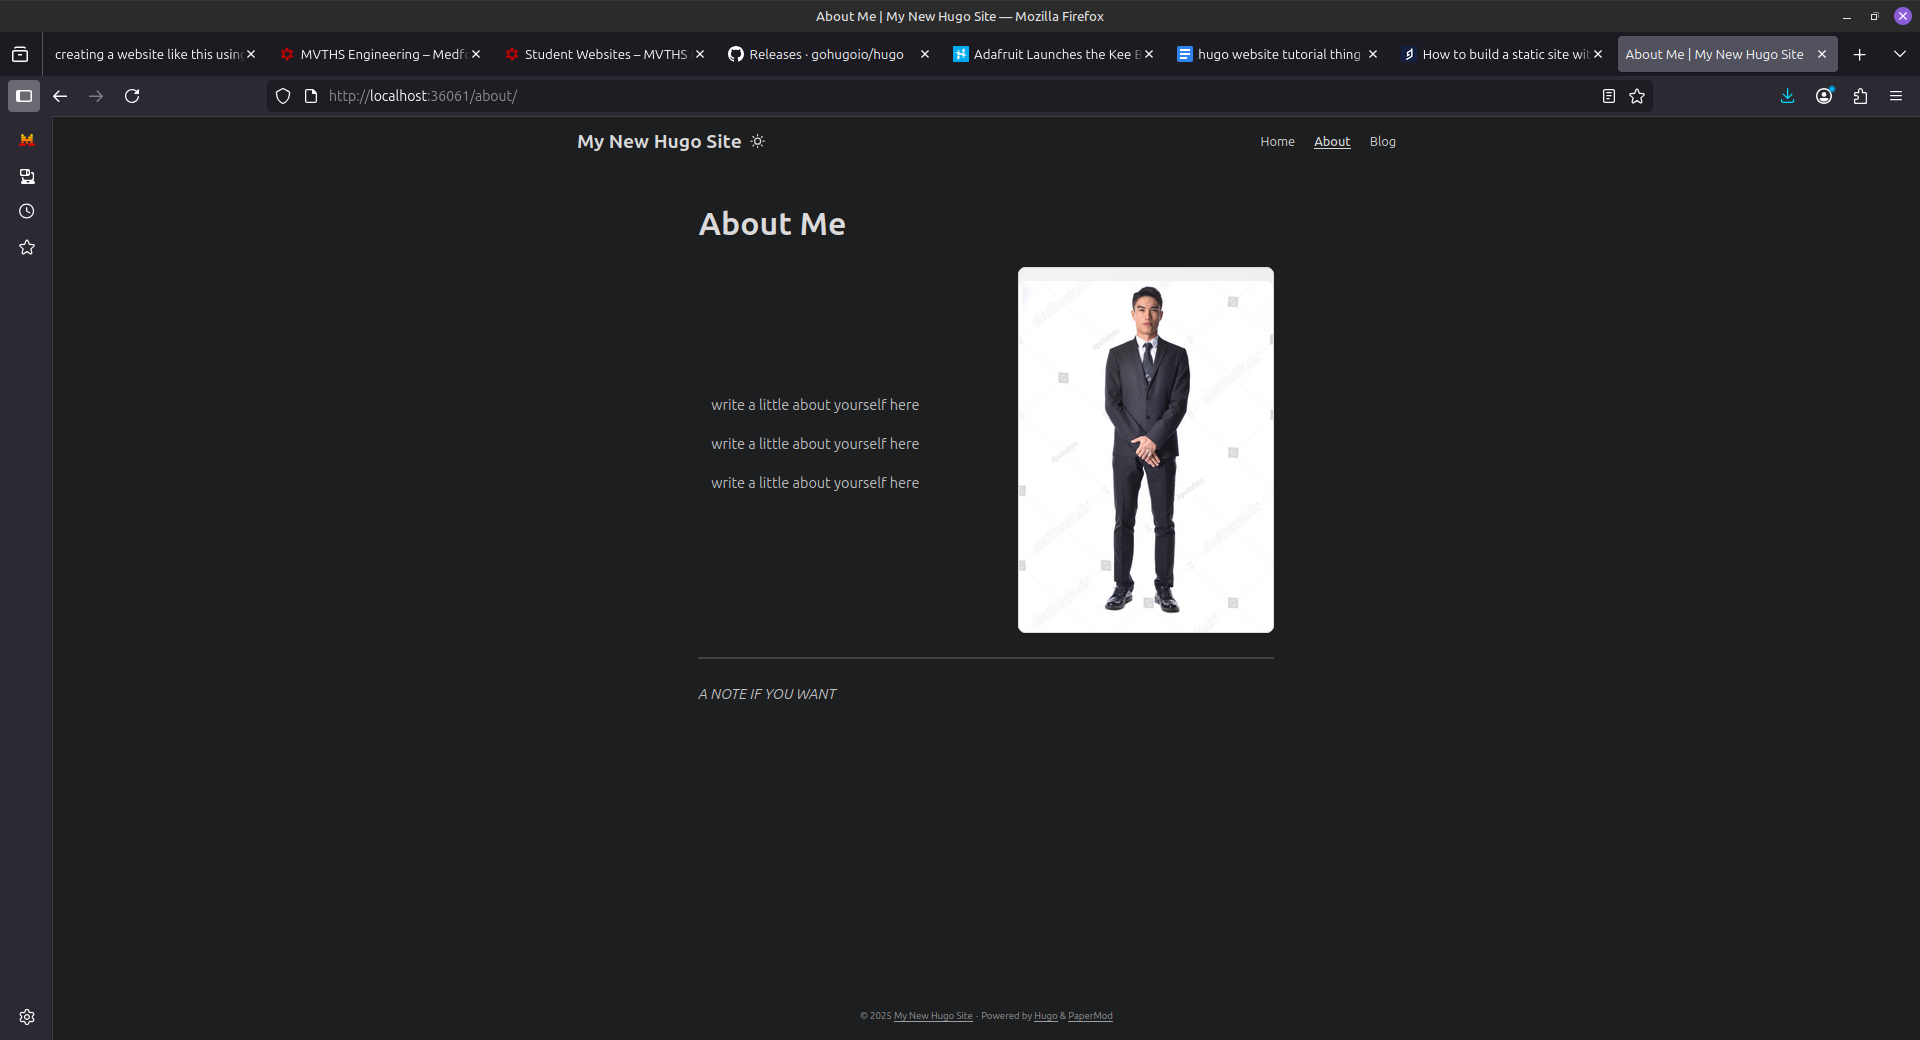
-
go back to the
about.mdfile and edit the<p>and change the image url to be an image of yourself. -
with this, you’re ready to turn it into a real website
pushing to github
NOTE: this will be how you create blog posts and push them to your live website
- go to github and create a repository for your website. name it whatever you want. click on create repository when done.
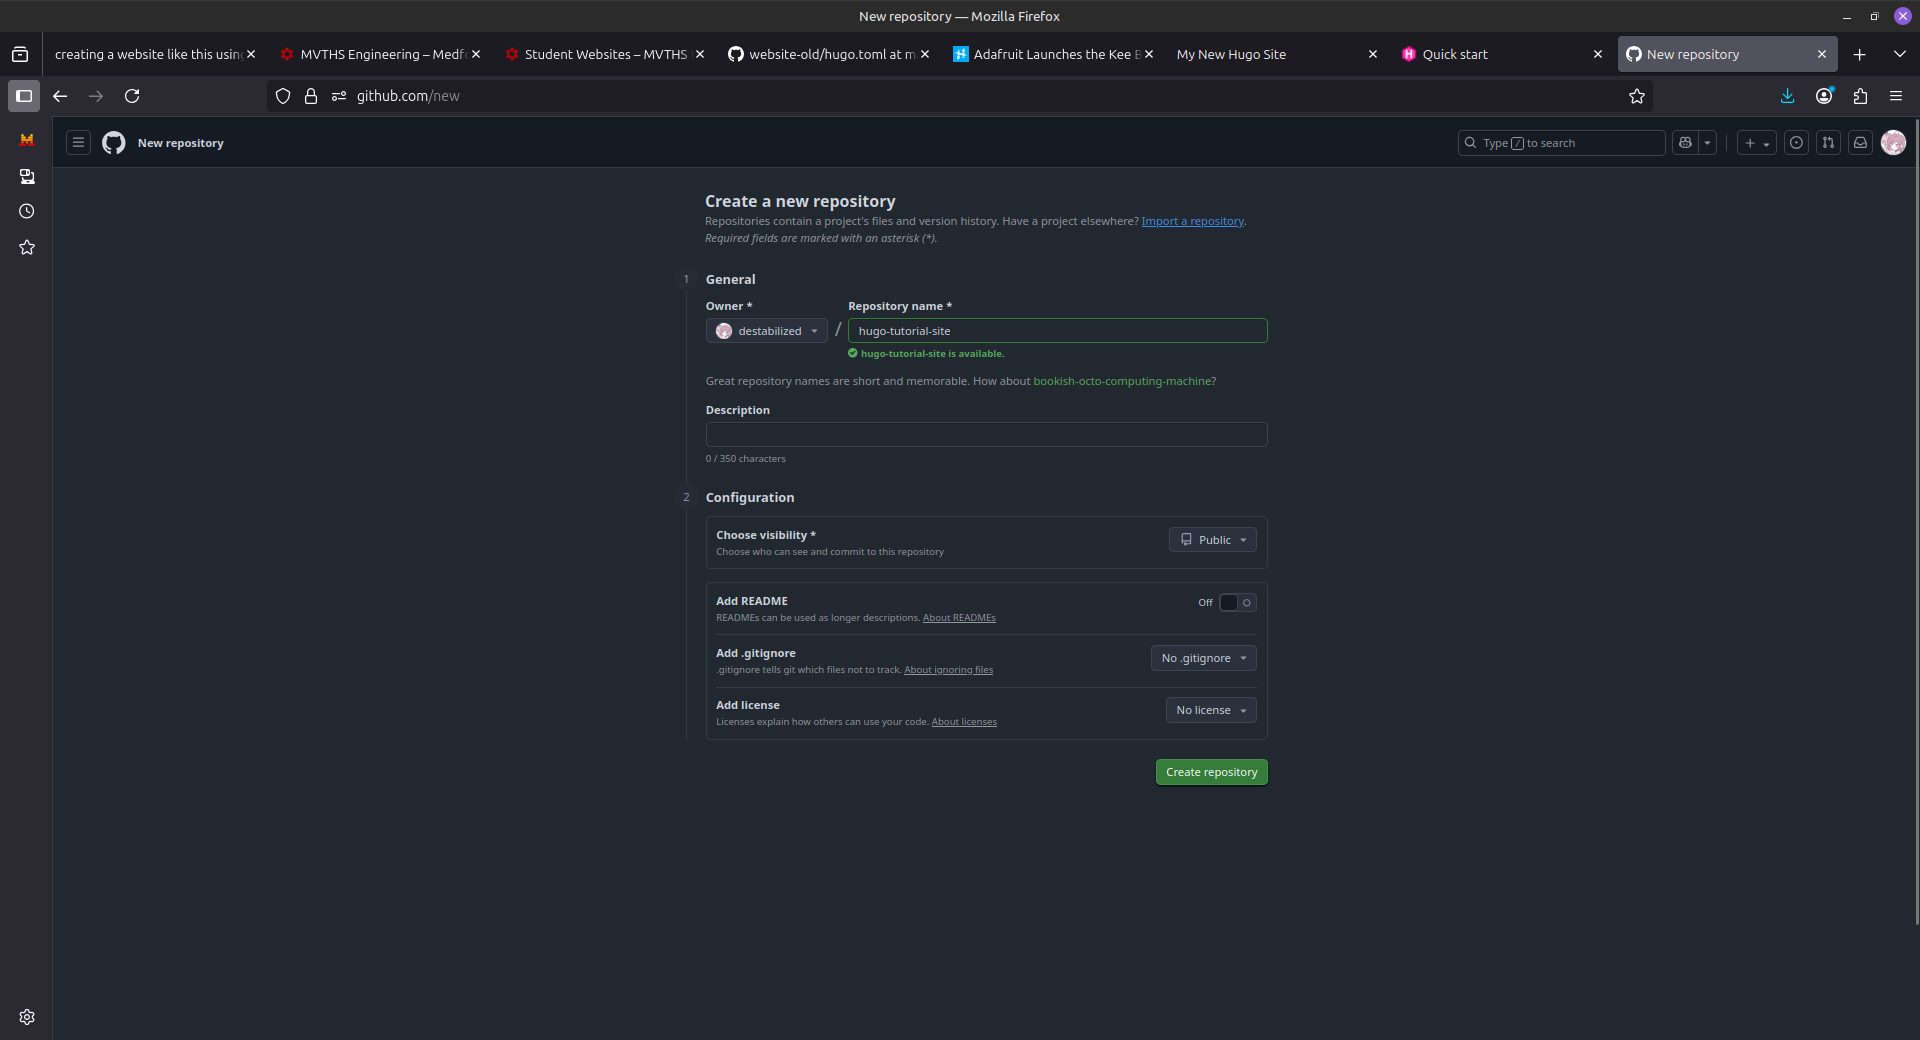
- copy the url of the page it brings you to (for example, this is mine)
https://github.com/destabilized/hugo-tutorial-site
note: depending on your github username and your repository name, the url will be different
-
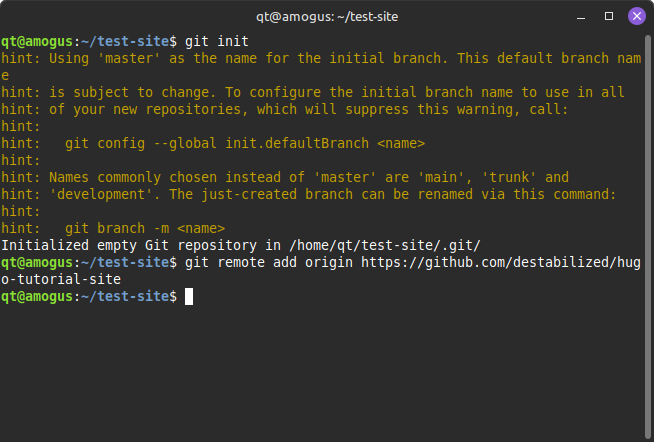
in your terminal,
cdinto your folder with your website -
type
git initand click enter. on the next line, typegit remote add origin https://github.com/destabilized/hugo-tutorial-site(your url here)
 note: you may have noticed that the folder has changed from exampleSite to test-site. ignore this. if you named your website
 website then cd back into website
-
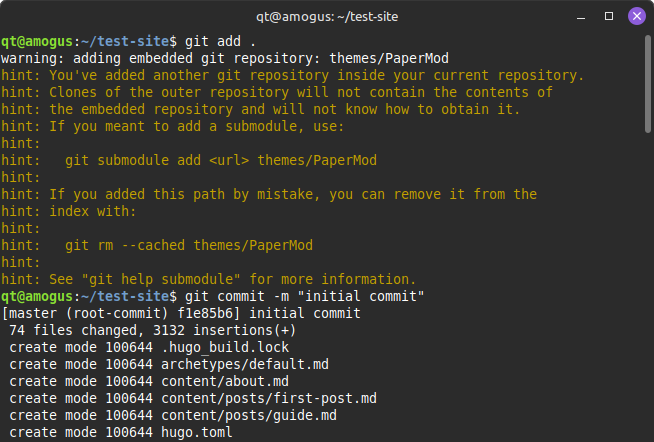
go back to your terminal on the directory of your folder and run
hugothengit add .(yes there is a period there) -
run
git commit -m "initial commit"(the text in quotes can be anything. since this is your first commit it’s good practice to have it as initial commit)
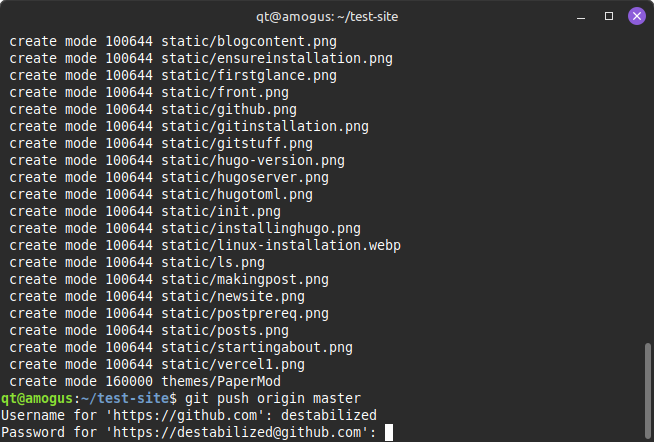
- run
git push origin masterand enter your github username.
-
when prompted to enter your password, use your github PAT token. (search up how to do this if you need to. make sure it has access to this repository) NOTE: you will need this everytime you push to git. keep your pat token somewhere so you don’t have to keep regenerating pat tokens
-
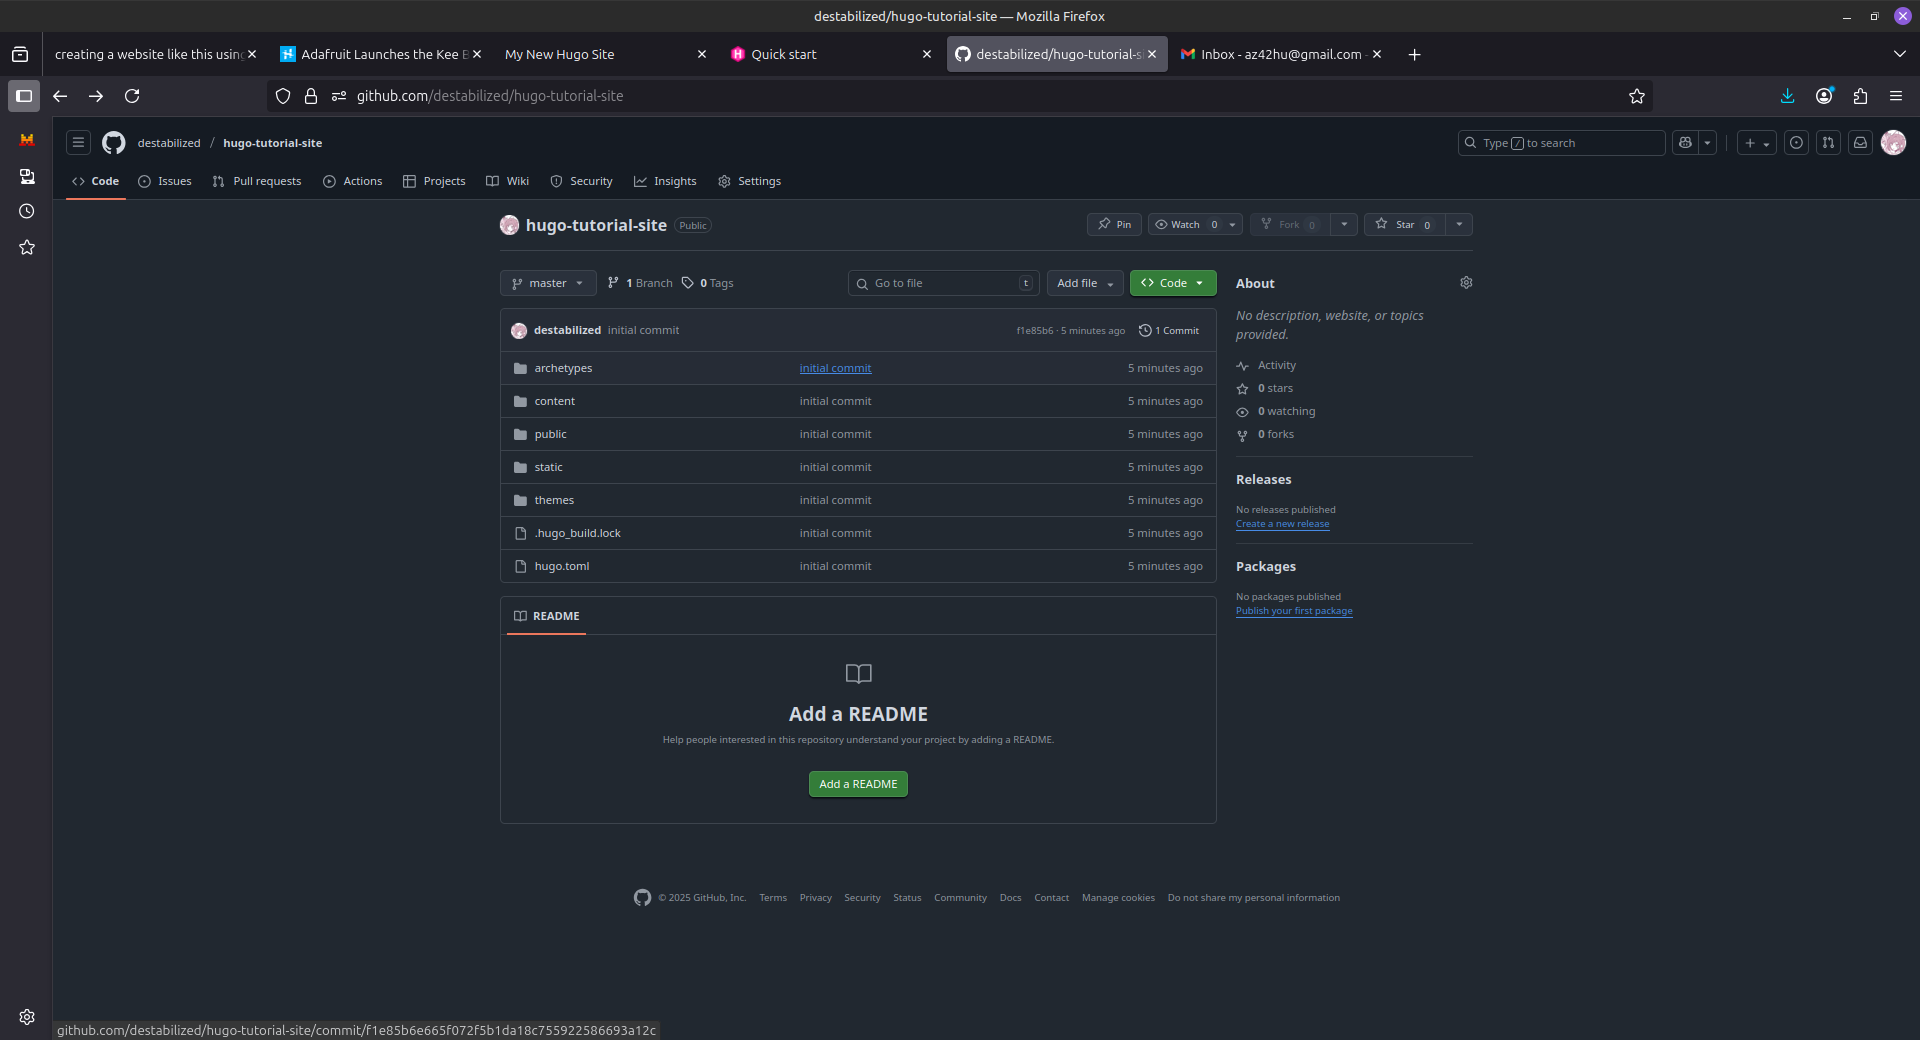
refresh your github repository page. you should see that it has been populated with all your files
setting up your website with vercel
NOTE: if you use any other website to host your website, don’t follow this tutorial
-
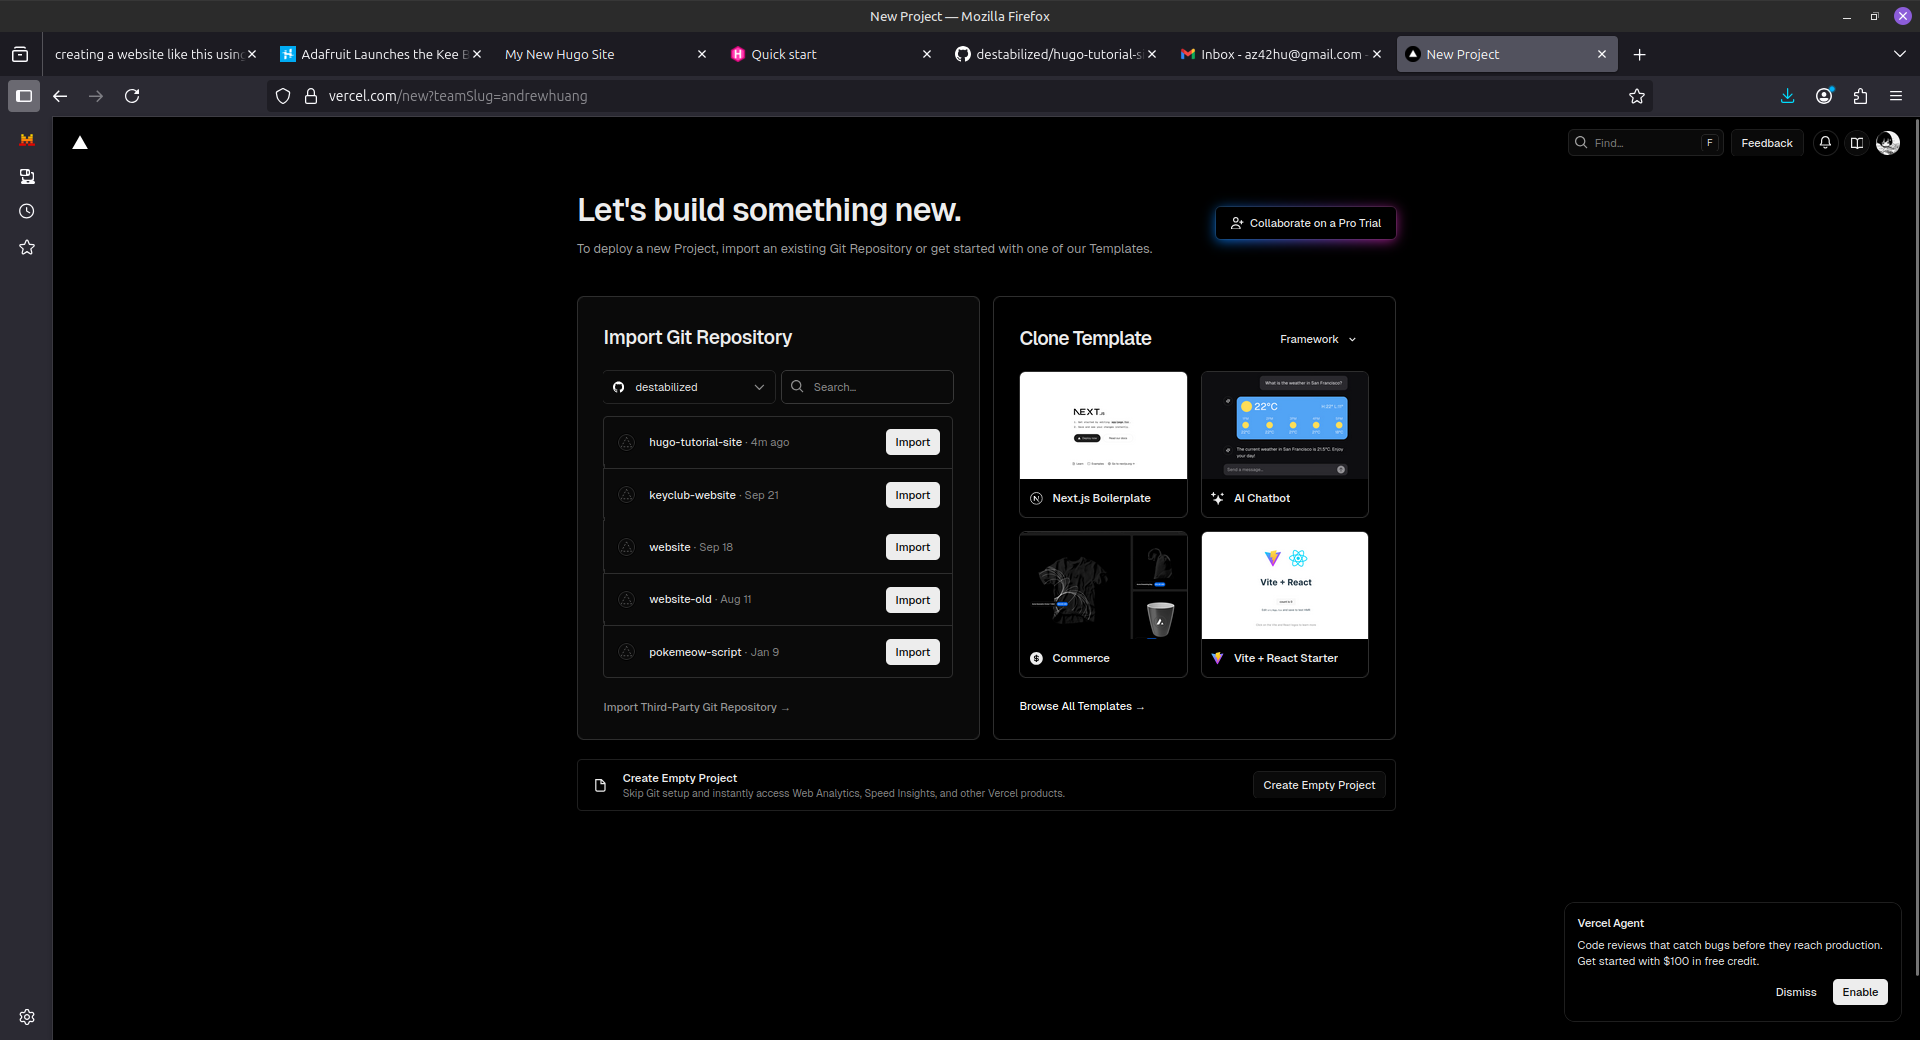
go to vercel and make an account
-
click the “add new…” button and click project

- you shoudl be prompted to this screen. connect to your github if you havent to see all your repositories.
-
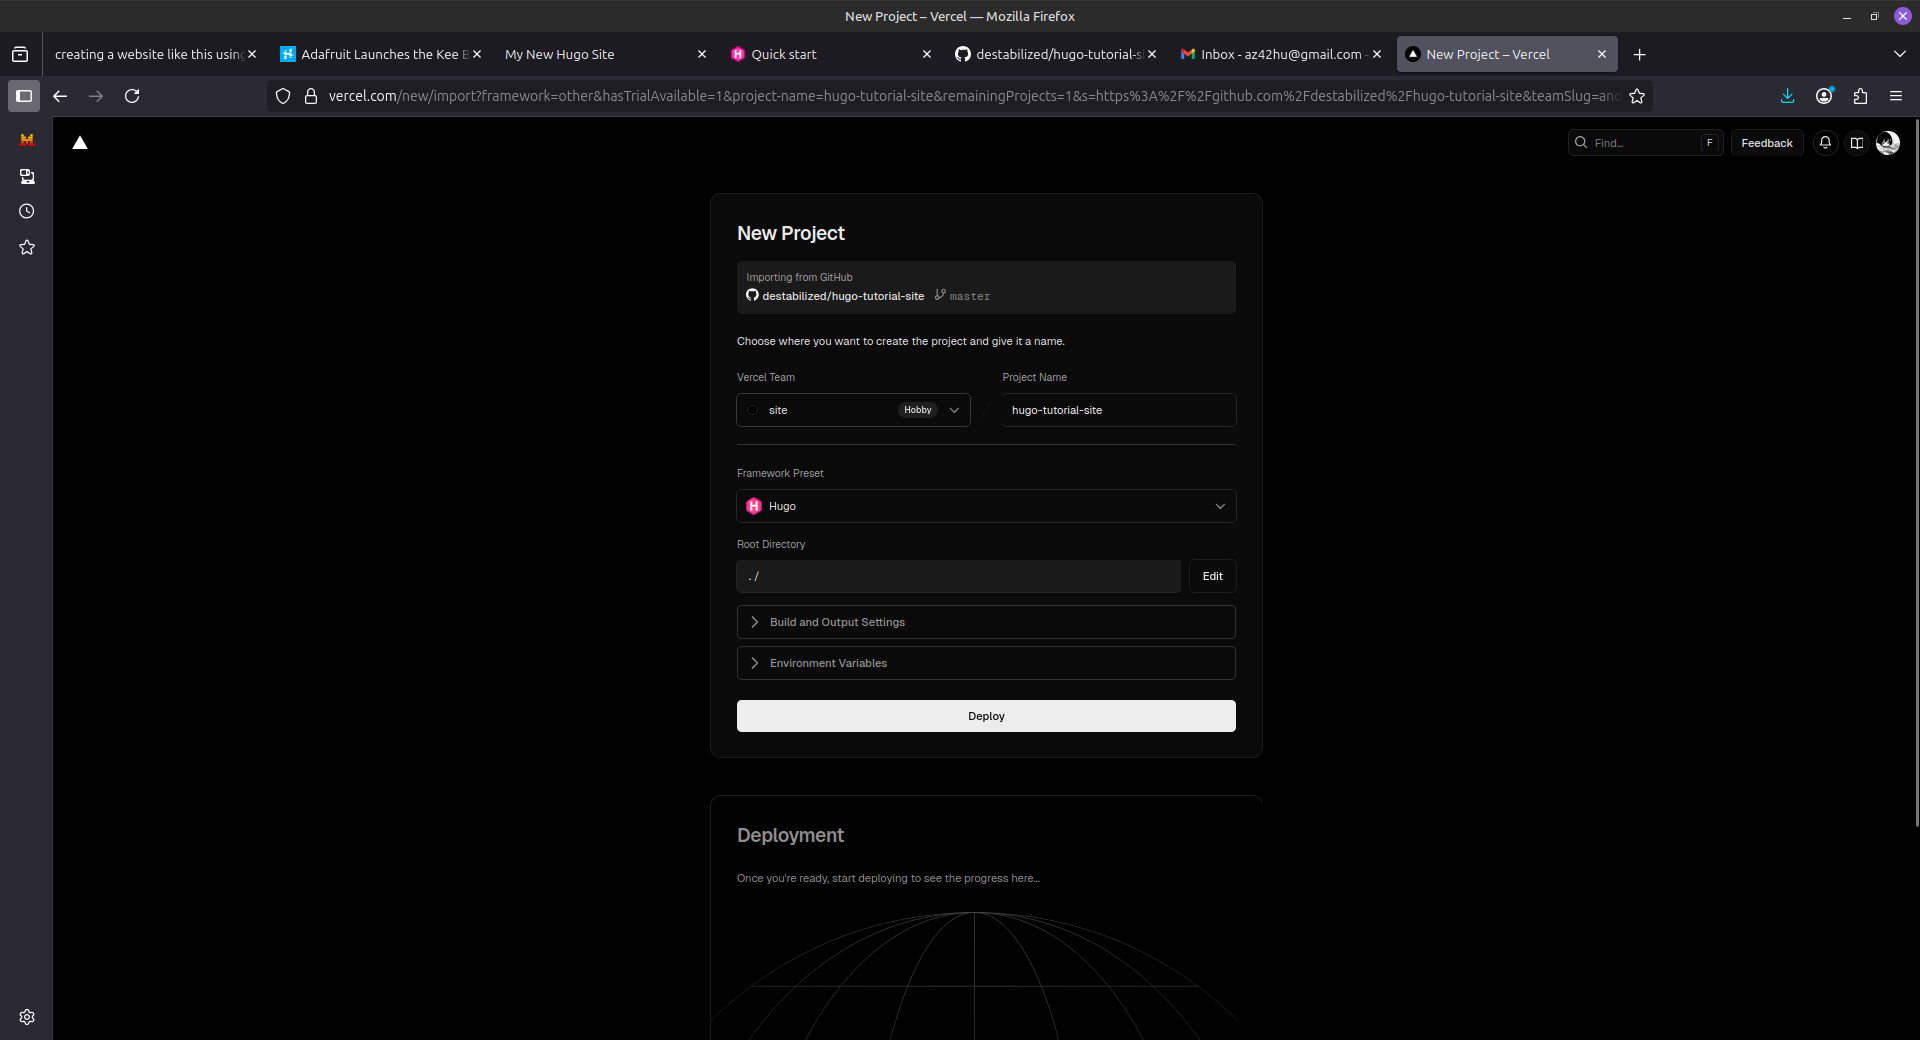
find your repository, and click
import -
create a vercel team called whatever you want, and change the project name to whatever you want. (this will be your url, so choose something that makes sense). make sure to change your framework preset to
Hugo
-
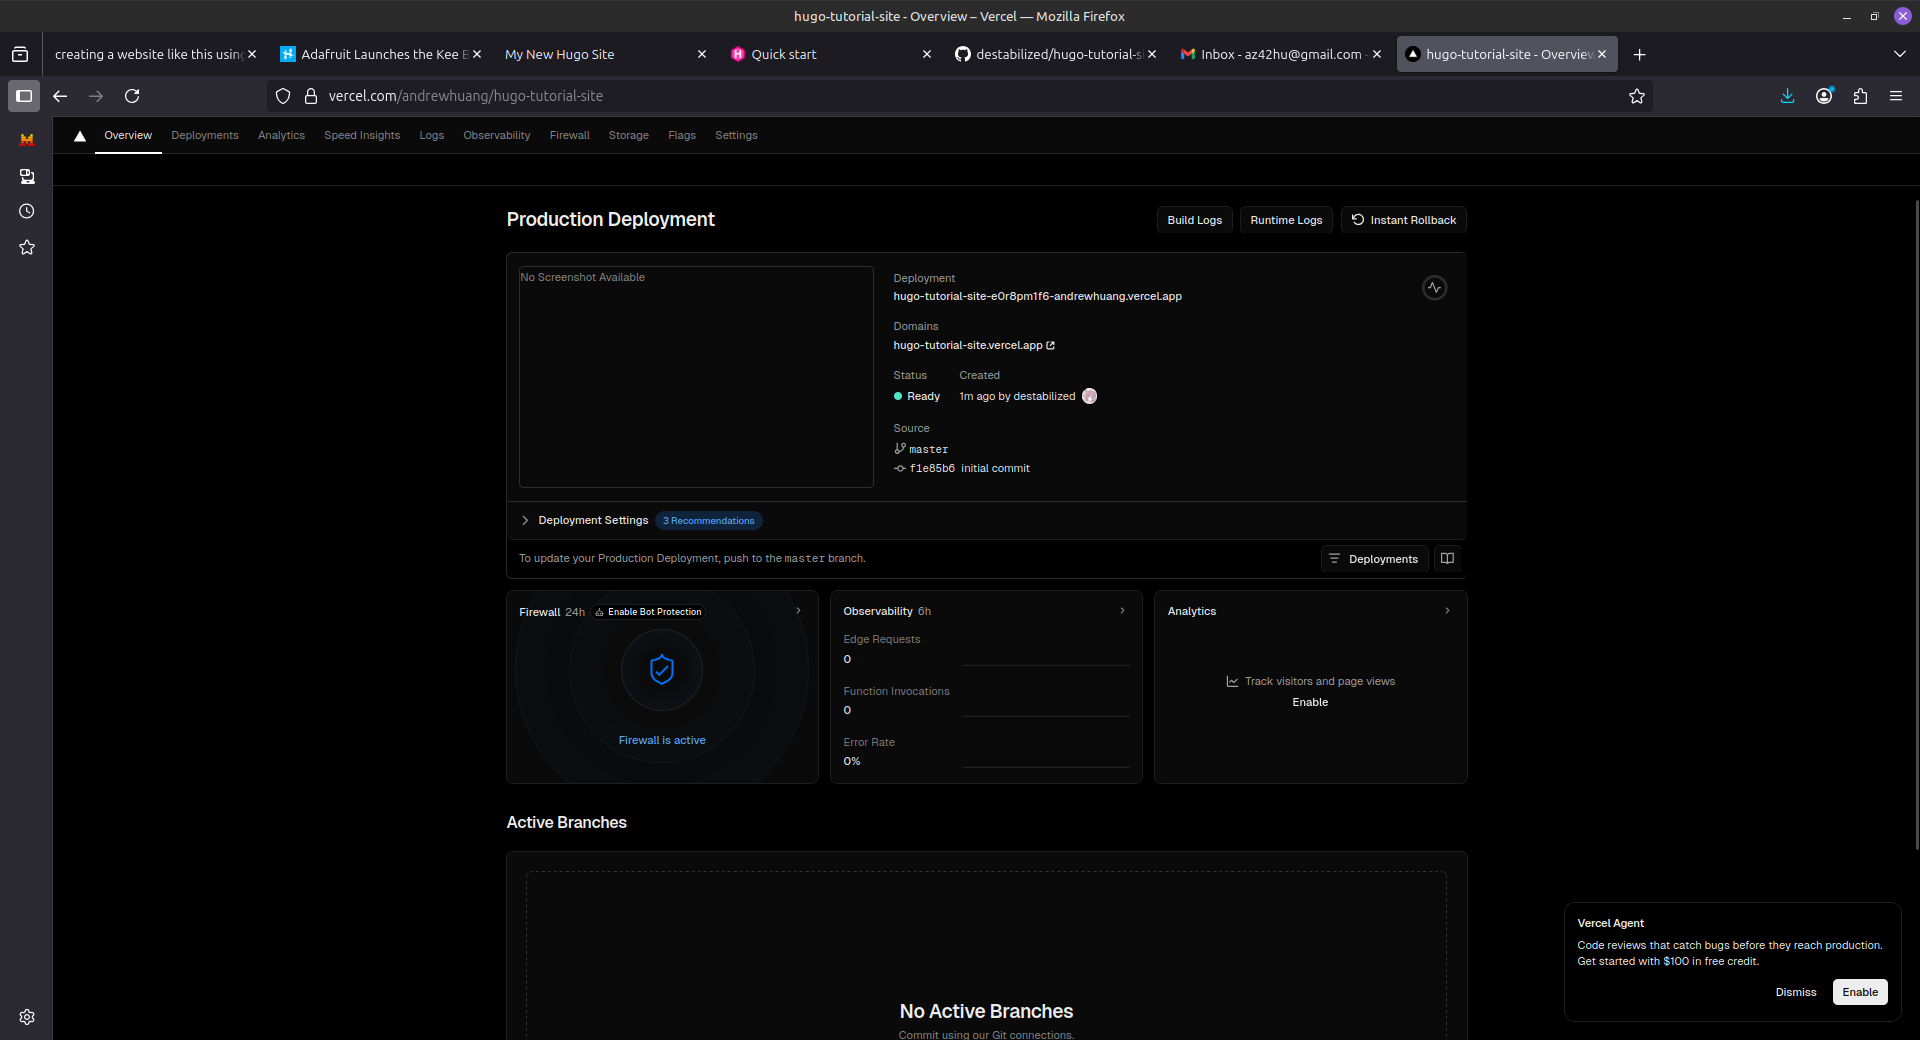
click
deploythencontinue to dashboard -
click on the link in
domainsto ensure everything is correct. if everything is perfect, then your website is done!!!111!!111!
ending notes
-
make sure to always push everything whenever you make an update. things will NOT change unless you push it.
-
your website takes some time to redeploy after each push. make sure to give it time and not relaunch multiple times
-
if you want to edit anything else besides what i’ve told you to, do your own research
okie bai